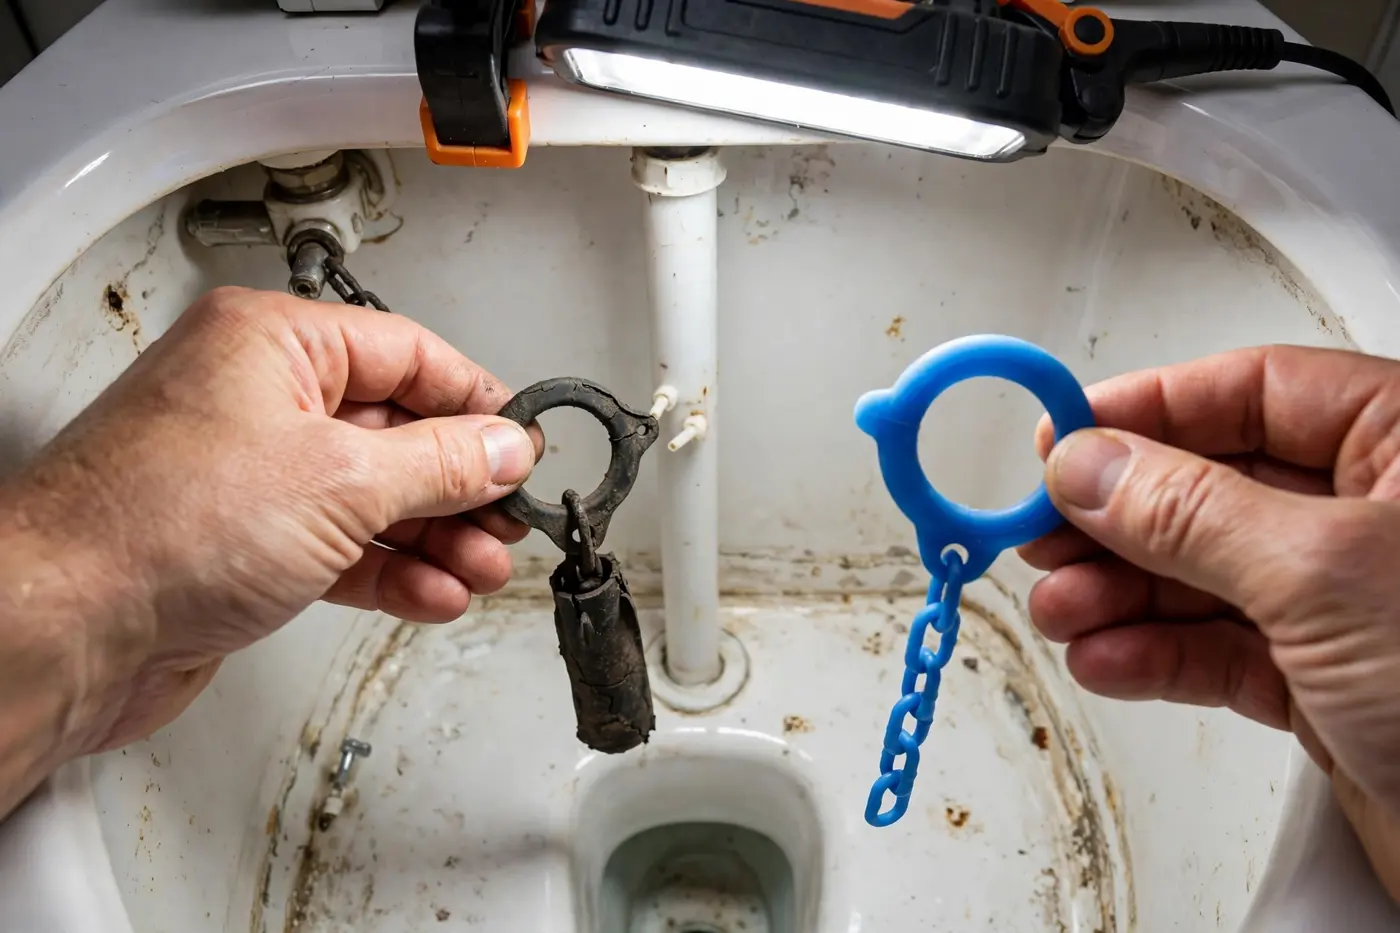
TL;DR
Problem: Your toilet runs on and off by itself, refills between flushes, or needs a handle jiggle to stop — classic signs of a flapper that no longer seals.
Solution: Confirm the leak with a dye test, match the flapper size, unhook the old one, clip on the new one, and set the chain with about half an inch of slack.
When to call: Call a local specialist if a new flapper still leaks, the valve seat feels pitted, or the fill valve never shuts off. Call (714) 410-0362 during open hours.
In this guide
The flapper is a simple part with an important job. It sits over the flush valve opening at the bottom of the tank. When you push the handle, the chain lifts the flapper, tank water rushes into the bowl, and then the flapper floats down and seals the opening so the tank can refill and hold its water. When that rubber seal warps, stiffens, or crusts over with minerals, water slips past it without stopping. The toilet responds by refilling a little every few minutes, all day and all night. Homeowners in Fountain Valley usually notice it first as a faint refill sound in a quiet house, a handle that needs jiggling, or a water bill that creeps up with no visible leak anywhere.
Swapping a flapper is one of the quickest repairs in the house — about fifteen minutes once you have the right part in hand. No water shut-off is strictly required for the swap itself, though turning the supply valve off is smart if yours works smoothly. This guide covers the test that confirms the flapper is at fault, how to size the new one, the swap itself, and the chain adjustment that decides whether the new seal actually holds.
Test first: is the flapper really the fault?
Do not buy parts on a guess. Two quick checks point at the flapper. First, the overnight refill check: note whether the toilet refills briefly when nobody has flushed for a while — at night, or when you come home. That refill-on-its-own pattern means water is leaving the tank slowly, and the flapper is the usual exit. Second, the dye test: add a few drops of food coloring to the tank water, wait twenty minutes without flushing, and look in the bowl. If color shows up in the bowl, tank water is leaking past the flapper seal. If the bowl stays clear but the toilet still refills on its own, look instead at the water level — if water stands above the top of the overflow tube, it is spilling down the tube, and that is a fill valve or water level issue, not a flapper issue. Our tank fill guide covers that side of the tank.
Also lift the tank lid and look at the flapper itself. Reach in and touch its edge. A healthy flapper feels smooth and flexible. A worn one feels stiff, wavy, blistered, or slimy, and you may see mineral crust along the sealing edge. In Fountain Valley, hard water speeds that crust up, and in-tank bleach tablets are hard on rubber as well — they sit in the tank and slowly eat at the flapper between flushes. If the flapper looks worn and the dye test confirms the leak, you have your answer.
Pick the right flapper size and style
Flappers come in two common sizes. Most toilets use a 2-inch flapper. Many newer high-efficiency toilets use a 3-inch flapper over a larger flush valve opening. The surest method is to remove the old flapper first and take it with you, matching diameter and mounting style in hand. If you want to buy before you start, measure the flush valve opening at the bottom of the tank — the round seat the flapper covers — and match that number.
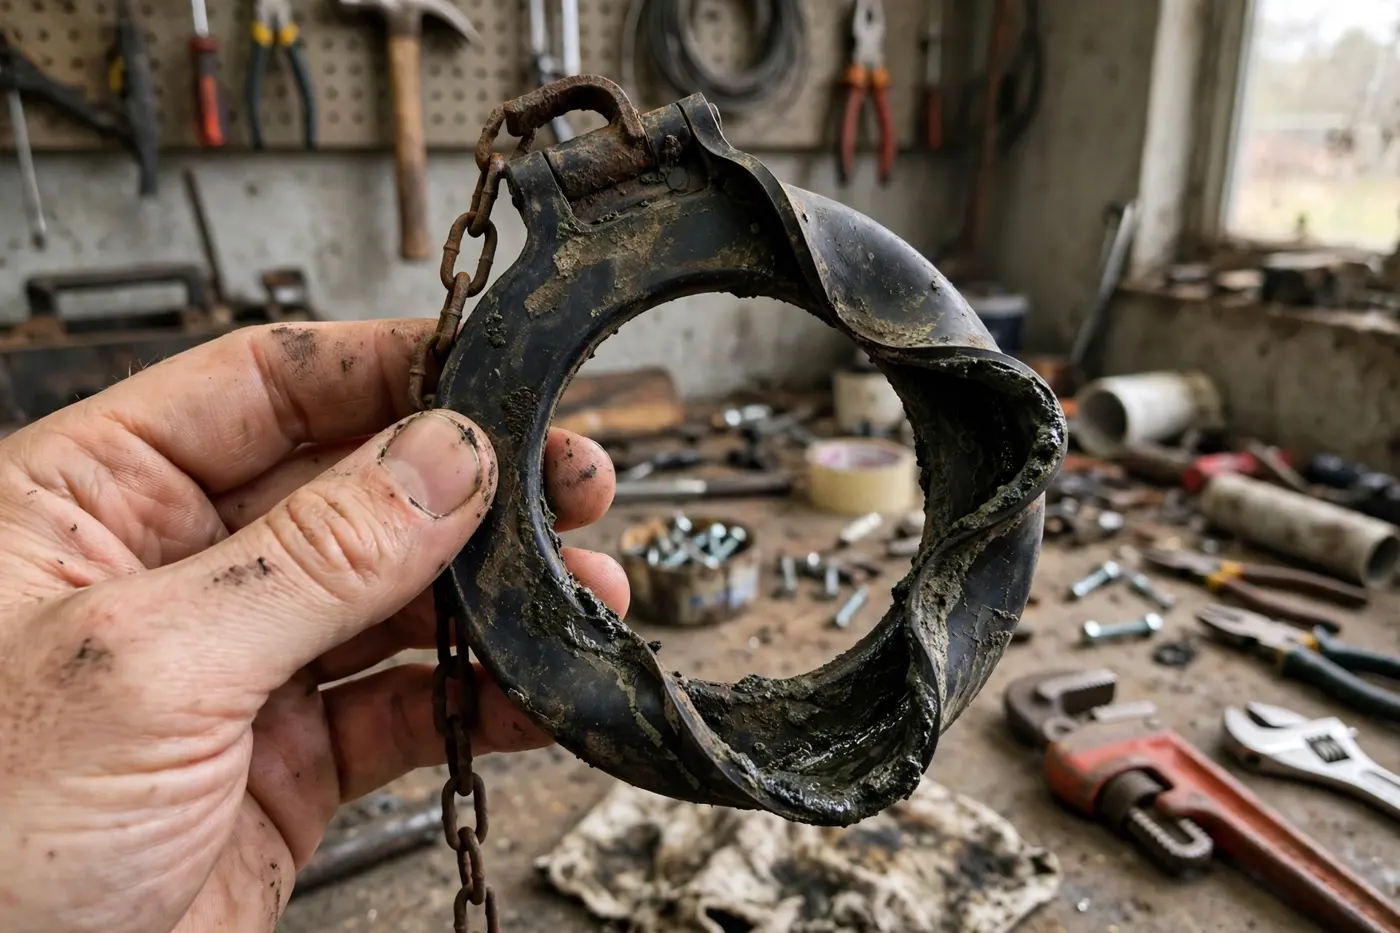
Mounting style matters too. Most flappers clip onto two small posts on the sides of the flush valve tower. Others slide onto the overflow tube or hang from a frame. Match the style you have. Some flappers are adjustable, with a dial or a movable float on the chain that changes how long the flapper stays open; those are useful on dual-pattern tanks, but a standard fixed flapper is the right pick for most single-flush toilets. When in doubt, bring the old part — matching in hand beats matching from memory every time.
Step-by-step flapper replacement
Remove the tank lid and set it somewhere safe
Lift the porcelain lid straight up and set it flat on a towel on the floor — not leaning against the wall, where it can slide and chip. With the lid off you can see the full tank: fill valve on one side, flush valve tower in the middle, flapper at its base, and the chain running up to the handle lever.
Unhook the chain and pop off the old flapper
Unhook the chain clip from the handle lever. Then unclip the flapper ears from the mounting posts on the flush valve tower — they flex off by hand. Lift the old flapper out and note how it sat, because the new one goes on the same way. If the old flapper has a foam float on its chain, note its position too; you will match it in a moment.
Wipe the flush valve seat clean
Run a finger and then a soft cloth around the valve seat — the rim the flapper seals against. Feel for mineral crust, grit, or a nick. Wipe away any crust so the new flapper lands on a clean, smooth surface. If you feel a pit or a rough patch that will not wipe clean, remember it: that is a seat problem, and it explains a leak that survives a flapper swap.
Clip on the new flapper
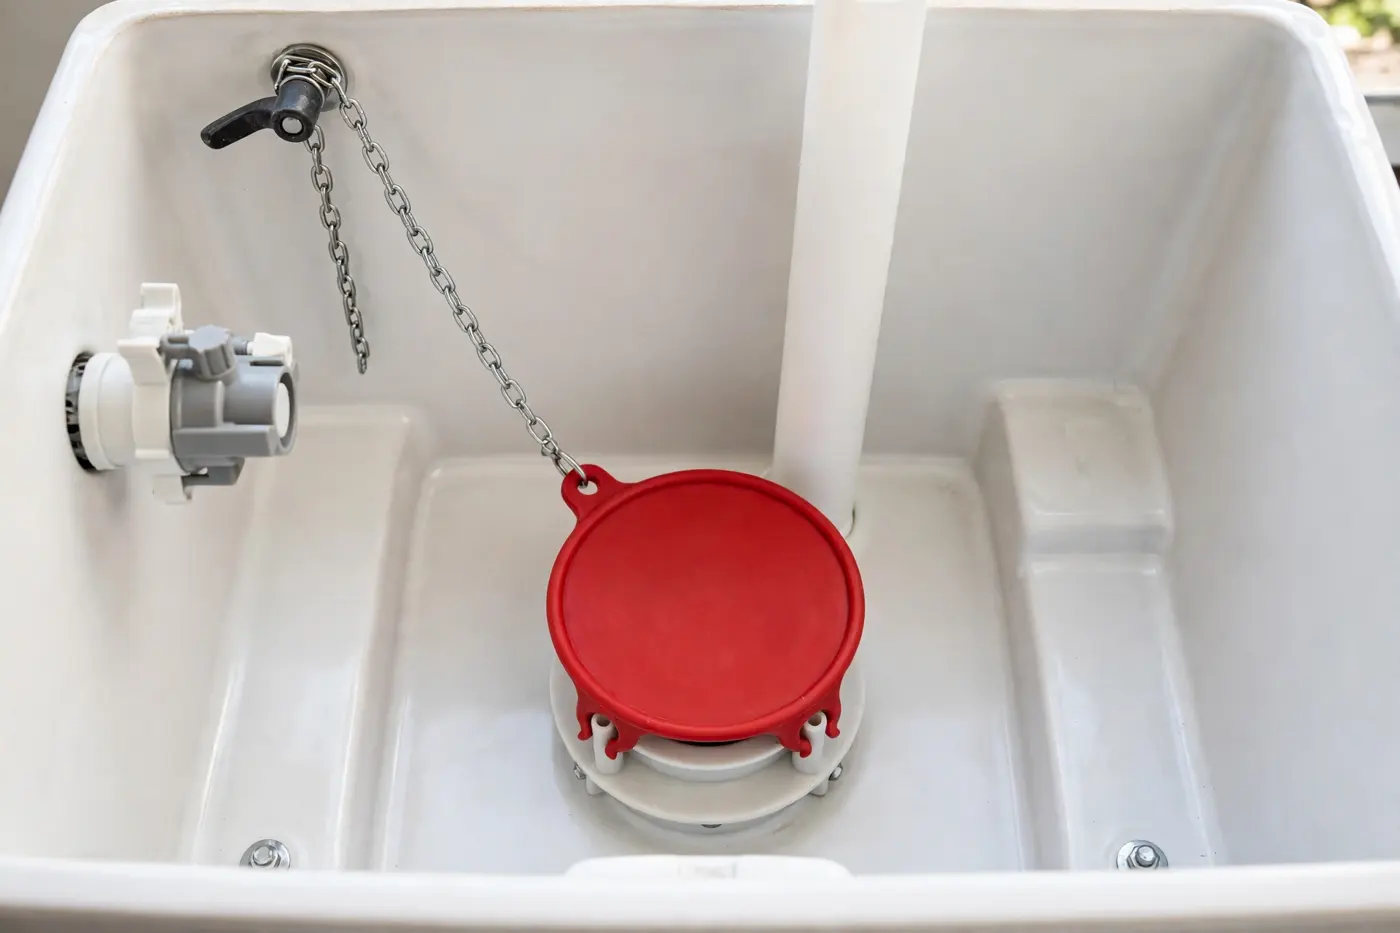
Clip the new flapper ears onto the same two mounting posts. The flapper should swing up and drop down freely, landing flat and centered on the valve seat. Give it a few test drops by hand. If it lands crooked, unclip and reseat it — a flapper that hangs slightly off-center will leak from day one.
Connect the chain with a little slack
Clip the chain to the handle lever. With the flapper closed, the chain should hang with about half an inch of slack — a slight curve, never pulled straight, never a deep loose loop. If your flapper has an adjustable float on the chain, set it near where the old float sat. Chain setup is covered in more depth right after these steps, because it is where most swaps go wrong.
Flush, watch, and repeat the dye test
Flush and watch the full cycle: flapper lifts, bowl clears, flapper drops, tank refills, fill valve shuts off, and silence follows. Flush two or three times. Then repeat the dye test from the start of this guide. Clear bowl water after twenty minutes means the seal holds. Replace the lid, and you are done.
Chain length: the small detail that decides the seal
More flapper swaps fail on chain length than on the flapper itself. A chain that is too tight holds the flapper a fraction off the seat, so water slips under it nonstop — the toilet runs worse than before, with a brand-new part. A chain that is too loose can slide under the flapper as it drops, propping it open, or tangle on the flush tower. The half-inch of slack in the steps above is the sweet spot: enough that the flapper falls fully shut under its own weight, not so much that loose chain wanders under it.
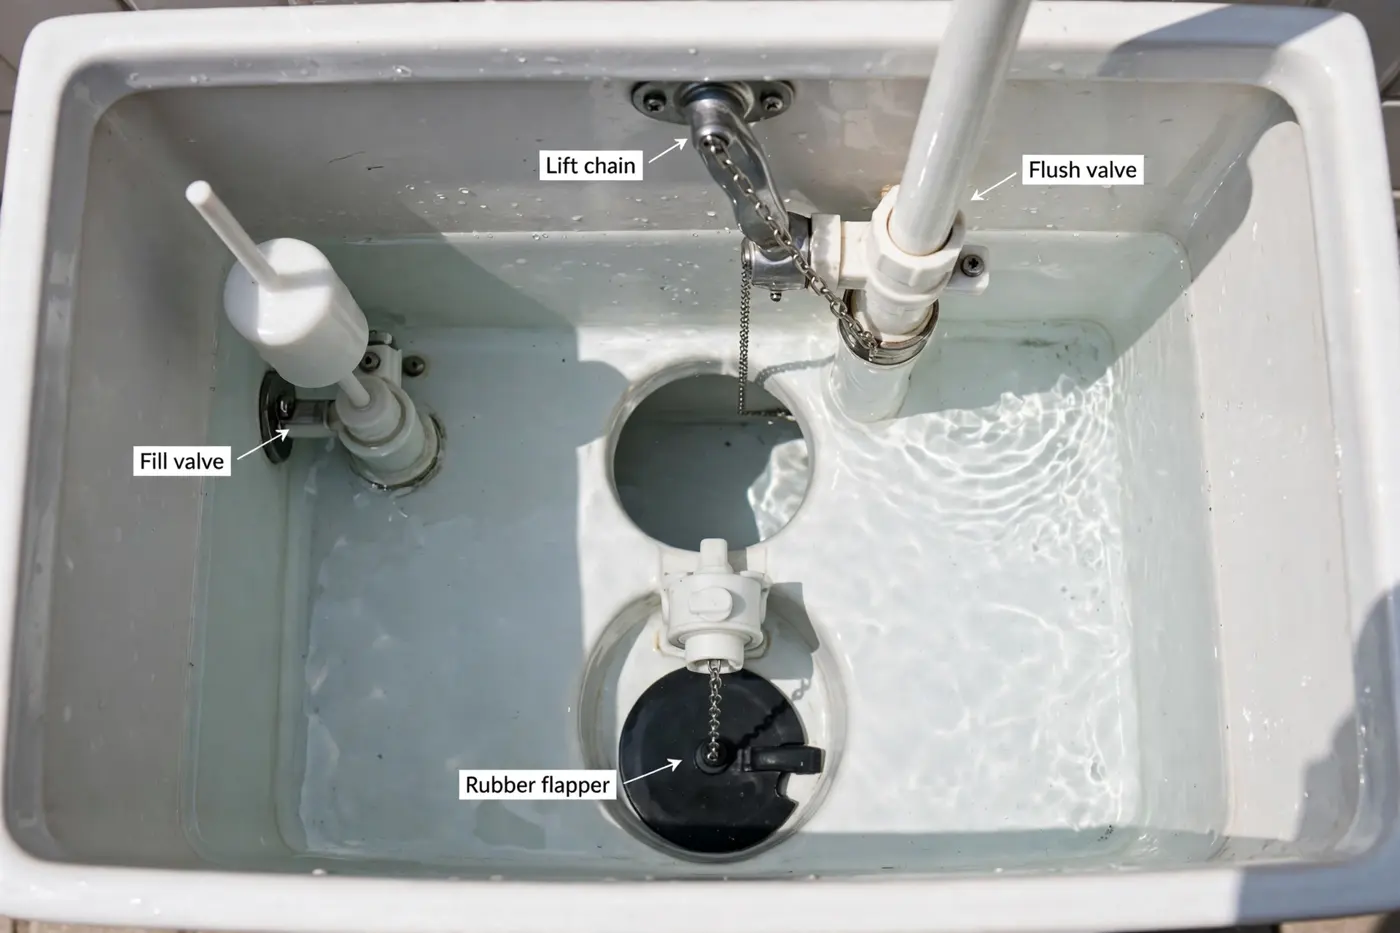
Also check where the chain clips to the lever. Levers have several holes along their length. Clipping closer to the handle end gives more lift; clipping closer to the tank wall gives less. Use the hole that lifts the flapper cleanly without yanking it. If the chain is rusty or its links are kinked, replace it with the chain on the new flapper rather than reusing the old one — a stiff link can hold the flapper open just like a tight chain does.
Still running after the swap?
If the toilet still runs with a new, well-set flapper, work through three checks before buying anything else. One: repeat the dye test. Color in the bowl means water still passes the seal — feel the valve seat again for pitting, and confirm the flapper size matches the opening, since a 2-inch flapper on a 3-inch valve will never seal. Two: watch the water level at rest. Water above the overflow tube mark means the fill valve needs adjustment or attention. Three: listen to the fill valve itself. A fill valve that hisses, chatters, or never fully shuts off will keep the tank in motion no matter how good the flapper is.
Stop point: a pitted flush valve seat, a fill valve that will not shut off, or water running over the overflow tube are beyond a flapper swap. Those call for fill and flush valve work, where the technician checks the seat surface, the fill valve and the water level as one system. You can also read more on the areas we serve page if you are outside Fountain Valley itself.
Questions about replacing a toilet flapper
How do I know which toilet flapper size to buy?
Most toilets use a 2-inch flapper, while many newer high-efficiency models use a 3-inch flapper. Measure the flush valve opening the flapper covers, or take the old flapper with you and match its diameter and mounting style. If the old flapper is too degraded to measure, note the tank shape and the valve seat size before you shop.
Why does my toilet still run after a flapper replacement?
If running continues, check the chain first — too much slack lets it slip under the flapper, and too little slack holds the flapper open. Next, run a finger around the flush valve seat to feel for mineral crust or a nick that breaks the seal. If the seat itself is pitted, a new flapper cannot seal against it and the flush valve needs attention.
How much chain slack should a toilet flapper have?
Aim for about half an inch of slack with the flapper closed — the chain should hang in a slight curve, not pulled straight and not draped in a deep loop. Clip the chain to the lever arm hole that gives that hang, then flush several times and watch the flapper drop squarely onto the seat each time.
How often should a toilet flapper be replaced?
There is no fixed schedule, because flapper life depends on water chemistry and use. In Fountain Valley, mineral-heavy water and in-tank cleaning tablets both shorten flapper life by stiffening and warping the rubber. Replace the flapper when the dye test shows a leak, when the rubber feels stiff or wavy at the edge, or when the toilet refills on its own between flushes.
When is a running toilet more than a flapper problem?
Call when water runs over the top of the overflow tube, when the fill valve hisses and never shuts off, or when a new flapper still leaks past a damaged valve seat. A technician checks the fill valve, the flush valve seat and the water level first, and the scope is confirmed with you before any work starts.